Multi project strings With Twine and R.swift
Share your strings and translations across multiple projects, including iOS and Android!
Highlights
- Create a shared strings file for Twine, with all strings and translations, for all your projects
- Generate per project and platform strings files to support all languages, such as Localizable.strings files on iOS
- On iOS, generate strongly typed code based on Localizable.strings files to use in your UI using R.swift
- In your Xcode project(s), set up Run Script build phase steps to handle Localizable.strings and R.swift code generation
Introduction
Inconsistencies in copy are a drag. Working on mobile apps across iOS and Android, it seems inevitable that things are going to get out of sync, whether it’s different capitalization on a title Um, the Android app says “Hello, world!” but iOS says “Hello, World!”? or confirmation button copy Did we mean to use “OK” or “Okay”? I see both. Twine is an open source command line tool that aims to solve this problem, by ensuring we conform to the DRY principle and only maintain a single source of string truth!
For the purposes of this article, we’ll be starting with an app that lists phrases in English only, to a fully localized app that supports multiple languages, getting all translations from a Twine data file that could be shared with an Android app!
Additionally, we’ll take it a step further and use R.swift to generate strongly typed localized string references from the Localizable.strings
Setup
Get the starter project: Github release or zip file download .
Install Twine if necessary
gem install twineInstall cocoapods if necessary
brew install cocoapodsLocalizing the project
As we will be generating our Localizable.strings files with Twine, all we need to do is ensure that the .lproj files for each language we intend to support are present in the project. Twine will auto-detect these and can both read and write to the directories per language. For our purposes, we will just be writing .strings files, but Twine can actually read existing ones and update the twine file with any it is missing! This is super helpful for converting an existing project with a lot of existing translations.
The initial project is already set up with a Base.lproj folder, using “Base Internationalization”. This means the developer language (English in this project) is the base language that our translations will be based upon, and we don’t need a separate English language file (en.lproj).
Twine generates strings to a Localizable.strings file by default. The easiest way to add these to the Xcode project is simply to generate an empty one for Base.lproj, and use the Localizations section in Project Info to create one for each localization.
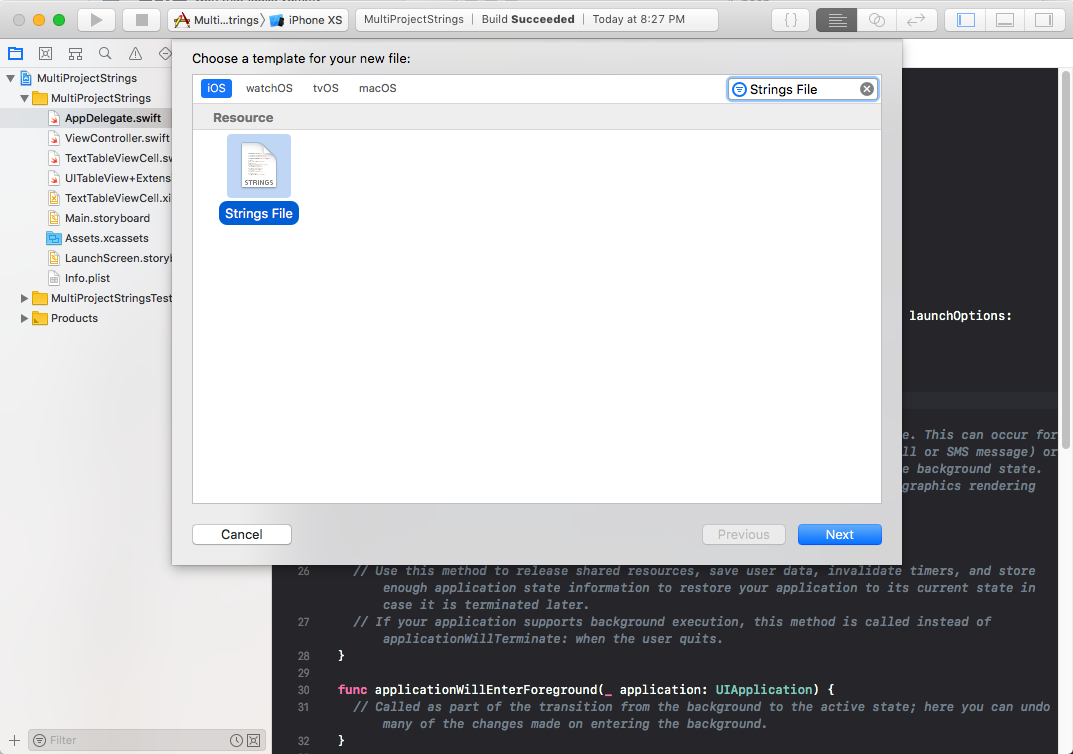
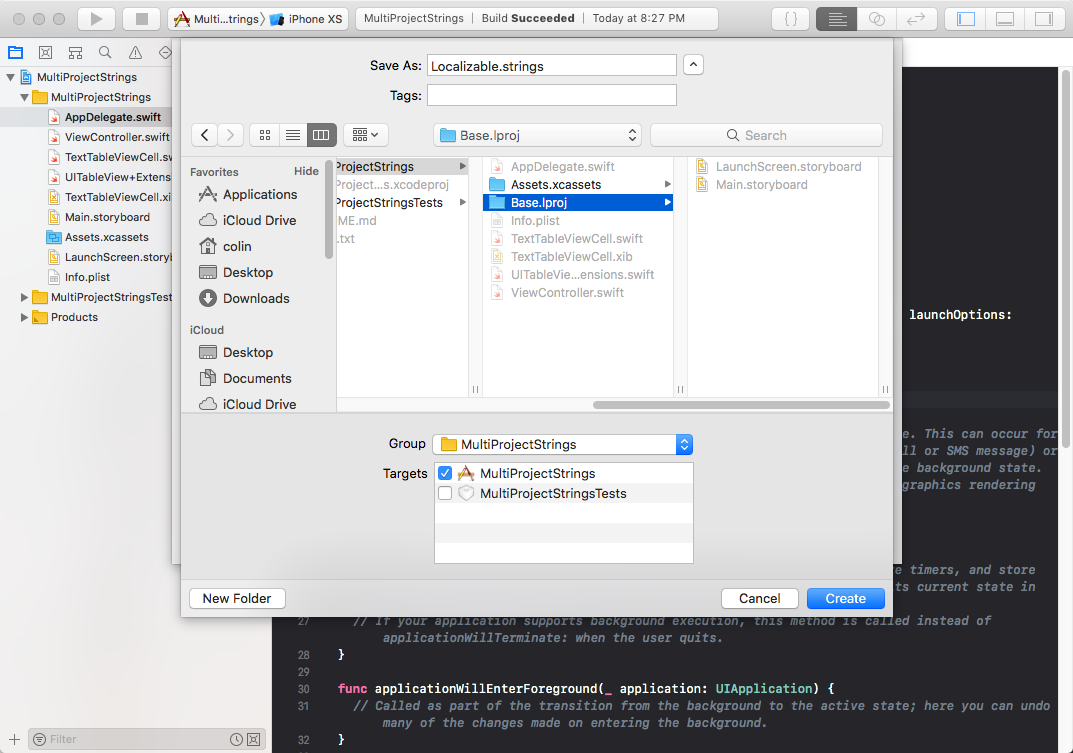
Create the initial Localizable.strings file for Base.lproj in Xcode. New File -> Strings File, naming it Localizable.strings. Make sure to create it under the correct target group, MultiProjectStrings, and place it inside the Base.lproj folder.
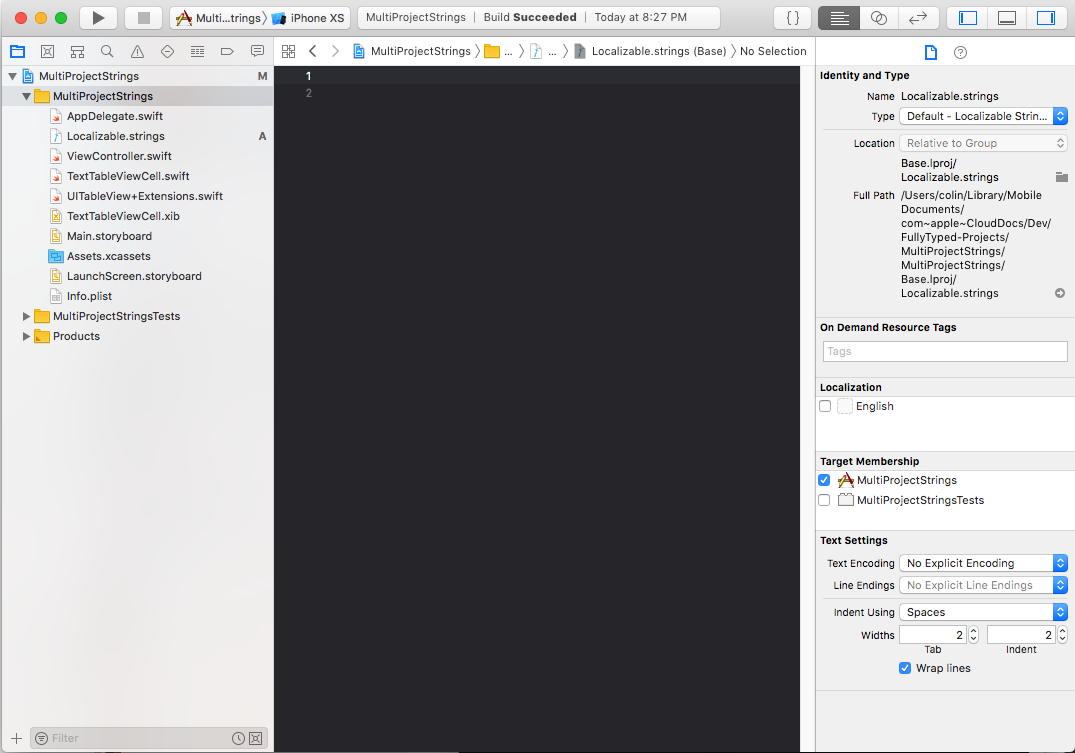
You can also clear the contents of the file, it will be overwritten by Twine later.
🚨🚨🚨 Do not select the English localization in the Identity Inspector, this would create en.lproj and a separate Localizable.strings file there.
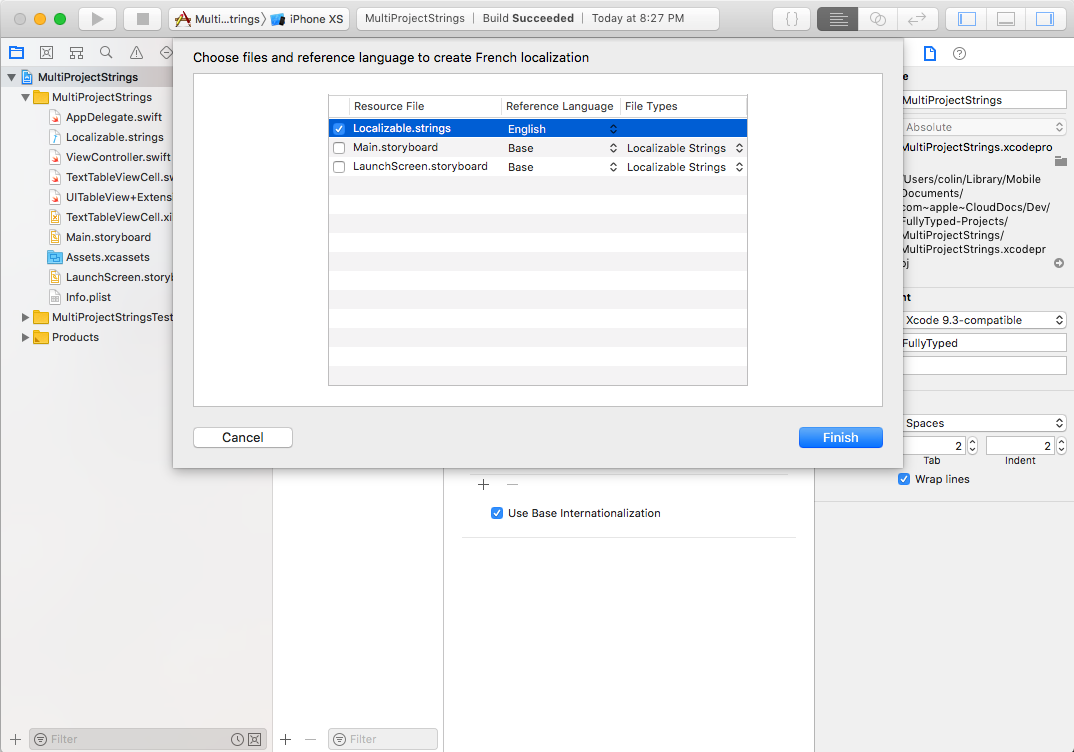
Now that we have the Base localization tracked in our Xcode project, we can create the localization files for our French and Spanish Translations. Essentially we need to make sure es.lproj and fr.lproj directories containing Localizable.strings files exist, so Twine can generate the translations, and Xcode will be able to see them. Navigate to the project file and make sure the Project and not one of the Targets is selected - under Info there should be a Localizations section.
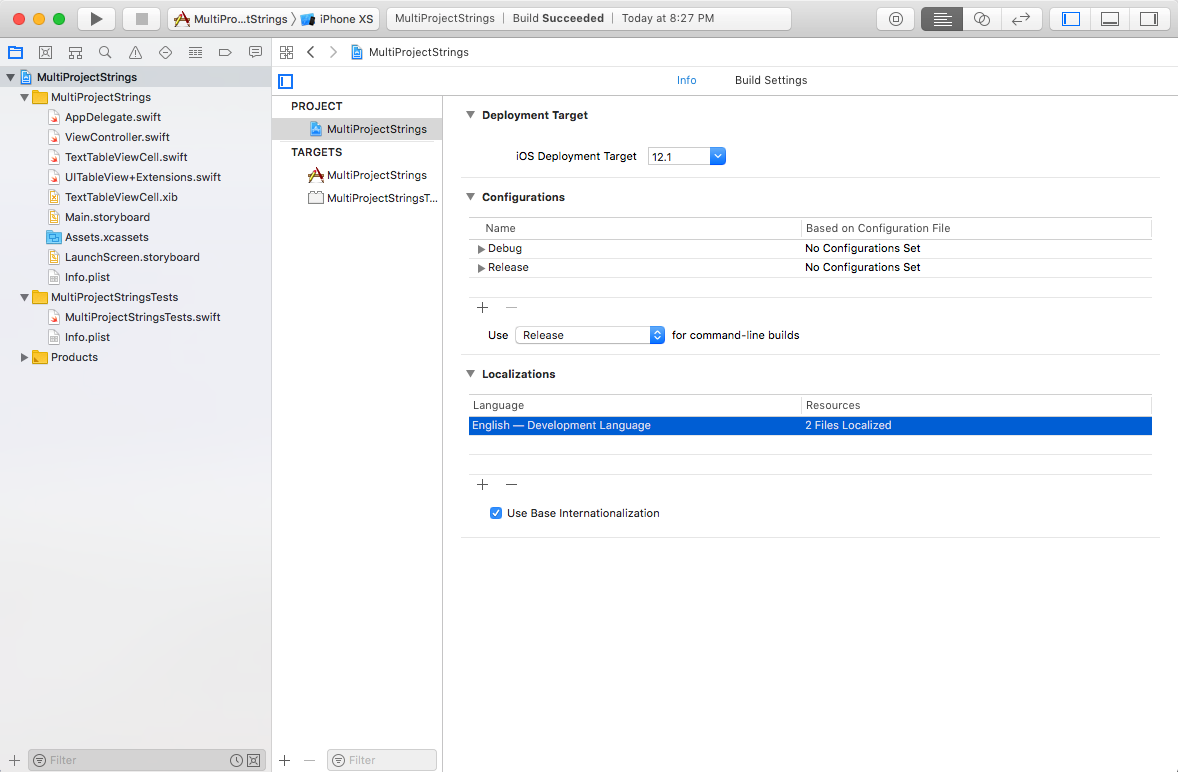
Add Spanish and French to the list. We won’t need the .storyboard localization files, but make sure Localizable.strings is checked when generating both Spanish and French localizations.
Generating localized strings with Twine
OK! Our project is fully set up to use localized strings for English, French, and Spanish. Now, we’ll create a twine strings file for our source strings, and set up our project so the necessary Localizable.strings entries are generated from it.
Create a file twine.txt in the root of the project directory with the following contents:
[[Example]]
	[count_of_strings]
		en = There are %d strings above this one
		comment = Example of integer substitution
		es = hay %d cuerdas encima de esta
		fr = il y a %d chaînes au dessus de celui-ci
	[hello_world]
		en = Hello, World!
		comment = a classic
		es = ¡Hola Mundo!
		fr = Bonjour le monde!
	[greet_user]
		en = Hello %@!
		comment = Greet the user by name
		es = Hola %@
		fr = Bonjour %@!
This is an example of a simple Twine strings file. Twine strings files are divided into sections - here we just have Example. Then, the string key values are nested underneath, with entries for each language, and an optional comment. Note we have one entry for each of the strings in the example app.
More about the syntax can be found in the README, but it is based on the Git config file format.
From the command line, we can generate Localizable.strings files for each Localization using the following command:
twine generate-all-localization-files twine.txt MultiProjectStringsBy passing in the strings file name and the directory containing the *.lproj, Twine matches the language keys in the strings file to the *lproj directories, creating the relevant keys inside the respective Localizable.strings files.
Give it a run! However, you will notice that the Localizable.strings values for Base.lproj are missing. This is because Base is not in our strings file. We could create an explicit English localization, but using Base gives us some advantages, including R.swift support which we will set up next. Instead, we can generate the Base.lproj localizations separately by specifying it explicitly in a second command:
twine generate-localization-file twine.txt MultiProjectStrings/Base.lproj/Localizable.strings --lang enIn practice, having to run two commands isn’t going to be an issue, as we are going to script both into our asset pipeline using a Run Script Build Phase in our Xcode Project.
Adding Twine Localizable.strings generation to build process
Following the practice suggested in Twine’s README, we will add this generation to our build process.
In Xcode, navigate to the “Build Phases” tab of the “MultiProjectStrings” target.
Click on “Add Build Phase” button and select “Add Run Script”.
Drag the new “Run Script” build phase up so that it runs before “Compile Sources”. It only needs to be before “Copy Bundle Resources” currently, but once we add R.swift to our build process it will be necessary.
Add the following to the script:
twine generate-all-localization-files twine.txt $TARGET_NAME
# workaround to generate Base.lproj Localizable.strings
twine generate-localization-file twine.txt "$TARGET_NAME/Base.lproj/Localizable.strings" --lang en
Now any time the project is built, it will pick up any changes to twine.txt! 💪
Using Localizable.strings in the app
With the strings created, we can now use the NSLocalizedString api to localize our view controller. Replace the definition of strings in ViewController.swift to localize our app:
  private let strings: [String] = [
    NSLocalizedString("hello_world", comment: ""),
    String(format: NSLocalizedString("greet_user", comment: ""), name),
    String(format: NSLocalizedString("count_of_strings", comment: ""), 2)
  ]
Change the scheme’s Application Language to French or Spanish and re-run the app to make sure the strings are translated:
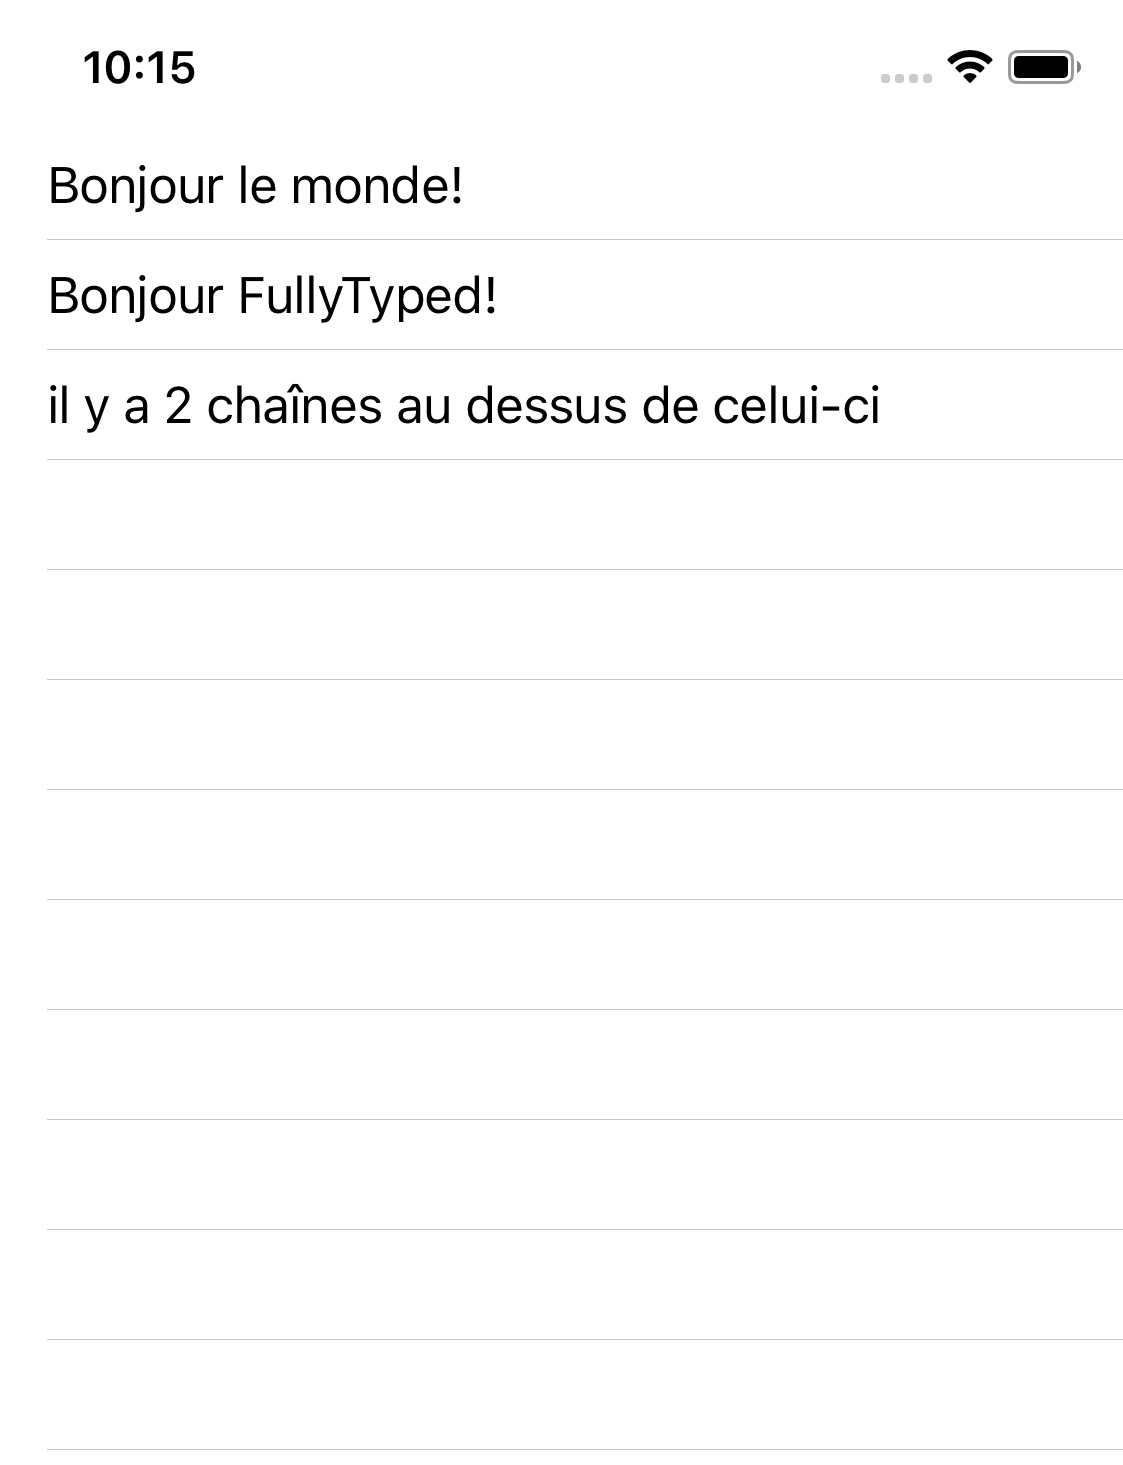
Awesome! However, this isn’t quite ideal. If any keys in twine.txt are renamed or deleted, or if the placeholders change, this could break our tranlated strings . Using NSLocalizedString, we won’t know about this until we run the app! To improve upon this, we can use R.swift to generate strongly typed string methods for each key in Base.lproj.
Installing R.swift
We will install R.swift as a project dependency using CocoaPods.
Create a new pod file with an entry for R.swift:
target 'MultiProjectStrings' do
  use_frameworks!

  # Pods for MultiProjectStrings
  pod 'R.swift'

  target 'MultiProjectStringsTests' do
    inherit! :search_paths
    # Pods for testing
  end

end
And install using pod install.
Open the MultiProjectStrings.xcworkspace file in Xcode and close the .xcodeproj file.
Adding R.swift code generation to build process
Essentially following the directions from the README:
In Xcode, navigate to the “Build Phases” tab of the “MultiProjectStrings” target.
Click on “Add Build Phase” button and select “Add Run Script”.
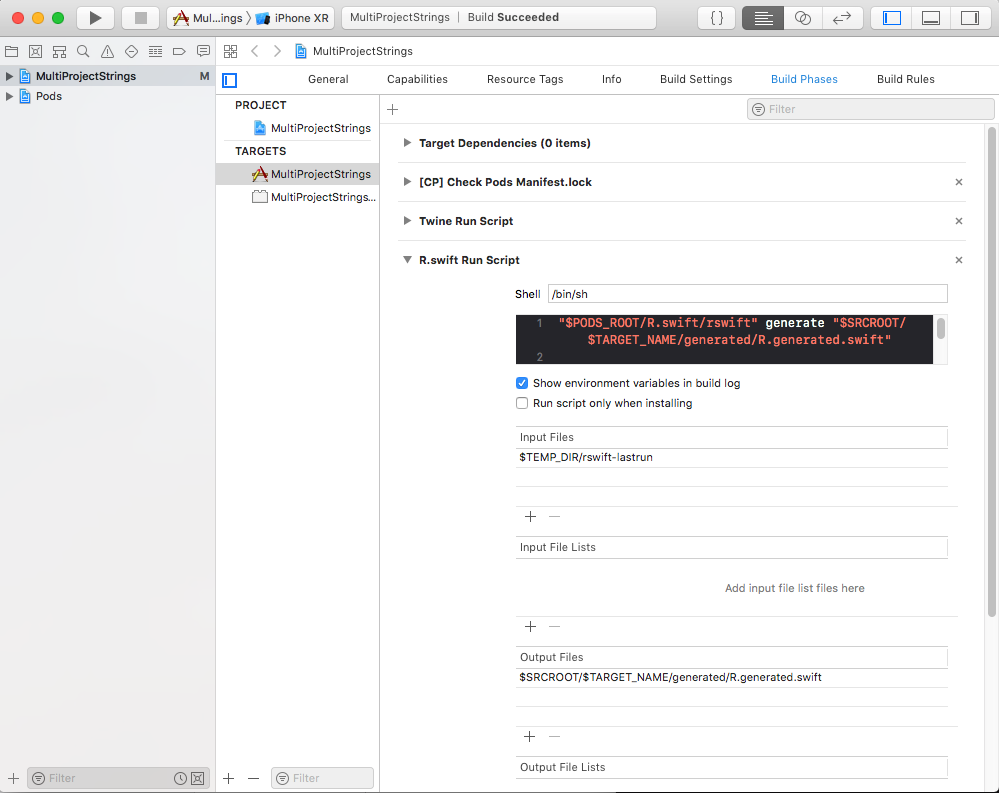
Drag the new “Run Script” build phase up so that it runs right after our “Twine Run Script” and before “Compile Sources”. This way, Twine will generate all Localizable.strings entries, and then R.swift will generate code to access the entries that will be compiled into the project.
Add the following to the script:
"$PODS_ROOT/R.swift/rswift" generate "$SRCROOT/$TARGET_NAME/generated/R.generated.swift"Add $TEMP_DIR/rswift-lastrun to the “Input Files” and $SRCROOT/$TARGET_NAME/generated/R.generated.swift to the “Output Files” of the Build Phase
This will create the generated code inside the target folder.
Run the project once, and add the generated R.generated.swift file to the Xcode project.
Replace NSLocalizedString with strongly typed string references
All that is left to do is replace our brittle calls to NSLocalizedString with R.swift’s strongly typed string extensions.
Replace the definition of strings in ViewController.swift one last time:
  private let strings: [String] = [
    R.string.localizable.hello_world(),
    R.string.localizable.greet_user(name),
    R.string.localizable.count_of_strings(2)
  ]
Awesome, we now get strongly typed string references, fully localized! As an aside, if we take a look in R.generated.swift, we can see that the proper NSLocalizedString methods are generated for each key. We just don’t have to maintain them ourselves 😎
      /// Base translation: Hello %@!
      ///
      /// Locales: Base, fr, es
      static func greet_user(_ value1: String) -> String {
        return String(format: NSLocalizedString("greet_user", bundle: R.hostingBundle, value: "Hello %@!", comment: ""), locale: R.applicationLocale, value1)
      }

      /// Base translation: Hello, World!
      ///
      /// Locales: Base, fr, es
      static func hello_world(_: Void = ()) -> String {
        return NSLocalizedString("hello_world", bundle: R.hostingBundle, value: "Hello, World!", comment: "")
      }

      /// Base translation: There are %d strings above this one
      ///
      /// Locales: Base, fr, es
      static func count_of_strings(_ value1: Int) -> String {
        return String(format: NSLocalizedString("count_of_strings", bundle: R.hostingBundle, value: "There are %d strings above this one", comment: ""), locale: R.applicationLocale, value1)
      }
Additionally, R.swift is smart enough to know if a format specifier is incorrect in one or more of your locales. A warning will be generated at build time, and the string extension will not be generated, so the project will fail to build at compile time 👍
In Conclusion
While its taken more than a few steps, we’ve gone from an app with hardcoded string values in only English, to a fully localized app with a cross platform/project localized strings file that could be used on other iOS projects, an equivalent Android app, or others. Additionally, thanks to R.swift’s code generation we can generate strongly typed accessors and NSLocalizedString calls on the fly.
Wow, thanks for making it to the end!
Get the completed project: Github release or zip file download
Hit me up on Twitter @akchiller with any questions or comments.